5 Ways I’ve Used Grammarly as a Freelance Content Writer to Be Better in Captivating my Audience
You come across a writing job that you know is perfect for you then you see these qualifications:
- Native English Speaker
- Perfect grammar
- Must be plagiarism free
- Can communicate in English
Instantly you feel that you’re not a fit and scroll to the next job post, only to find that they have more or less the same requirements. Now, if you were like me 5 years ago, you’ll probably close your PC/laptop and lick your wounds in the corner. Another scenario is that you’ll end up accepting job offers for lower rates because you don’t meet the said requirements.
Thankfully, you those are not the only options you have. There are now grammar checker tools that you can use to check and improve your writing, and they have come a long way since 2009. Grammarly is one of the best grammar checkers that come highly recommended even by professional writers. It’s an excellent tool for those who are struggling with self-editing as it checks grammar, spelling, as well as plagiarism. Let’s talk about how you can use it for checking your work.
Create a Grammarly Account
Before we move on, the first thing you have to do is to go to the Grammarly website and sign up for an account. This way, you have access to the online editor, as well as have the option of updating your account to premium for other advanced features.
Once you signed up, here are several different ways for you to use Grammarly to help improve your writing.
Option 1: Using the Grammarly online editor

The online editor is a convenient way of creating and editing your article. It’s simple and an excellent choice for those who don’t have access to any word processor. Now, before I forget, remember that every English language has a different rule to follow. Once you got your account set up, go to your account and click Customize (available for premium users only). Set the Language Preference to set the proper grammar rules for your article.
You have two ways to use the online editor.
Upload the file:
- Click My Grammarly and you’ll see the New icon.
- Click upload and choose the file that you want to check.
Copy-Paste
- Open your text document and do Ctrl-A.
- Copy the entire text and then click New in the My Grammarly dashboard.
- A new page will load. Type the title, then paste your article in the text editor.
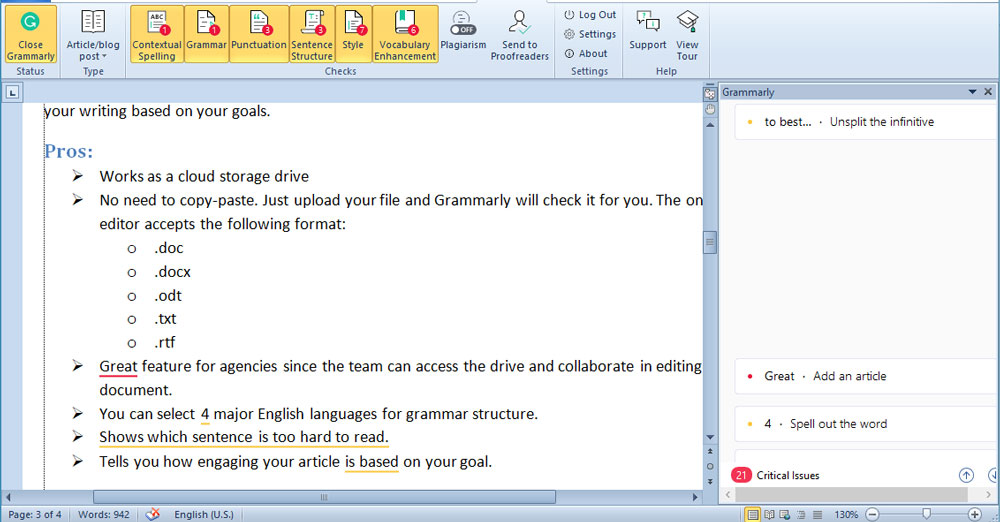
Once you’ve uploaded or pasted your article, a popup window will appear. This will help you set your goals for the article. Choose all that is appropriate to help Grammarly program itself how to edit your work. After a few seconds, Grammarly will then show word suggestions on how to best improve your writing based on your goals.
Pros:
- Works as a cloud storage drive.
- No need to copy-paste. Just upload your file and
Grammarly will check it for you. The online editor accepts the following
format:
- .doc
- .docx
- .odt
- .txt
- .rtf
- A great feature for agencies since the team can access the drive and collaborate in editing a document.
- You can select 4 major English languages for grammar structure.
- Shows which sentence is too hard to read.
- Tells you how engaging your article is based on your goal.
Cons:
- Removes any formatting (i.e headers, footers, styles) of an uploaded file
- Does not offer any text formatting options for uploaded files
- Does not store images
- You have to be online to use it.
Option 2: Grammarly for desktop

If you don’t want to use the Grammarly online editor, you have the option to download the Grammarly desktop app. Go to your Grammarly Dashboard and click Apps. Depending on what OS you’re using, you’ll see the Grammarly for Windows, or Grammarly for Mac. Choose where you want to download the installer, then run it after its finished downloading.
The Grammarly desktop app has the same interface as the Grammarly online editor. You’ll be able to adjust your goals based on the theme of your article. You can also upload the file or copy and paste your article in the Grammarly app.
Pros:
- Synced to your Grammarly cloud drive
- Perfect for those who are easily distracted by the internet.
- You can set your goals just like with the online editor.
Cons:
- You need internet access for grammar checking.
- Loss of style or text formatting for uploaded files

Option 3: Install the browser plugin
This option is perfect for those whose tasks involve web access, such as uploading articles, blogs, or web pages. This allows you to do a final run on your article before you publish it for the web. This has saved me several times, especially when I’m low on energy or rushing too much on a project.
Installing the Grammarly browser extension is easy. Open your Grammarly Dashboard, and click Apps. Click Grammarly for Chrome/Safari/Firefox/Edge. As a writer, I find this extremely useful in uploading blog posts. The extension allows you to check for correction within the text editor or field in your website, social media, or email. If you want exhaustive editing, clicking on the green Grammarly icon at the lower right corner opens up a new tab for the Grammarly online editor. You’ll see all the issues you need to fix, and you can post your social media post or send your email with confidence.
Pros:
- You can use with your blog text editing tool
- It helps polish your social media post
- It’s compatible with your webmail editor (i.e. Gmail)
Cons
- It’s unstable in some websites. I got an error that the Grammarly pop-up editor’s not available for my WordPress site.
- You have to set the language preference in your Grammarly Dashboard
Option 4: Install the Word
This is, by far, my favorite way to use Grammarly. Finish what you’re writing and apply all the styles, table, and graphics that you want to apply to your document. When you’re ready, Grammarly will check your work without causing you to lose any stylistic edits and formats that you’ve did on your document.
Another great feature that you need to take advantage of is that you can set Grammarly according to the type of article that you’re writing. You can set it for:
- General
- Academic
- Business
- Technical
- Medical
- Creative
- Casual
What if you’re writing several articles or documents for different clients? Say one client is in the US, and the other is in Australia? Set your preferred language by clicking the Grammarly tab and choose Settings > Language Preference. This will open a new browser window for your Grammarly Dashboard settings, and you can select the language that you need.
Pros:
- Keeps you off from internet distractions as you’re writing on Word
- You can customize the grammar checking to business/formal or casual, depending on the purpose of what you’re writing.
- You keep your style formating
Cons:
- Internet connection required to check for grammar errors
- Depending on the speed of your internet or pc, Grammarly may take time to load.
- Has a learning curve and can be overwhelming to use at first.
- Language Preference can only be accessed in the Grammarly Dashboard
Option 5: Use it in Google Docs
Grammarly launched its beta version for Google Docs in October 2018. It was a life-saver for me because I work in a clinic in between freelancing. I write my book during lul hours on Google Docs, and that gave me the freedom to edit my book without having to wait for me to have access to MS Word. When I get home, all I have to do is copy-paste my work to a Word document and do minor edits on the formatting. However, it’s still on the beta phase. Although it does serve it’s purpose, Grammarly for Google Docs has a few bugs and limitations.
Pros:
- Easy interface
- Ideal for online collaboration between editors
Cons
- Still has some flaws, so it’s not as efficient as the previous options.
- Only available in Google Chrome
Benefits of Using Grammarly
- Polishes your writing. Let’s face it. English is not our first language, and we will get grammatical errors. Using Grammarly can help you spot significant mistakes that we don’t usually see such as tenses, proper use of “is” and “are”, to name a few.
- Let’s you edit your work. Once you’re done writing, Grammarly can help you make proofreading easy. The highlights will tell you instantly where the problems are. That can speed up your editing to as much as 30%.
- Improves communication. Grammarly can also check your emails and social media posts. You can use it on Gmail, Facebook, LinkedIn, and Twitter. Download the Android or iOS app, and it will also proofread your text messages.
One of the best benefits that I like about Grammarly is the plagiarism checker (premium only). It gives me an objective measure as well as proof on the authenticity of my articles.

I tried it on a published article on my blog. My site has a very low page ranking, which makes it challenging to find the blog post. However, Grammarly was able to crawl through thousands of websites. As a result, it was able to spot the similarity. If your client wants proof that your article is authentic, show them the screenshot of the plagiarism check result
Does this mean you don’t have to hire an editor? No, of course not. Grammarly is not 100% accurate, but it does impressive word on your post. I would say it’s capable of polishing your writing to as much as 40% in terms of grammar and spelling. When it comes to sentencing structure, the flow of thought, order, and cohesiveness of the post, you still need a human editor. Still, running your work through Grammarly will help iron out your work, and your editor will appreciate you for it.
However, I can tell you that it does help improve writing. I’ve been using it for two years, and I’m seeing the results. Having one will also help you convince your target employer to consider you. I always say that I have the Grammarly Premium subscription to check for grammar and spelling errors, so they will still get articles that are easy to read without having to spend extra on editors.